
After you click the File tab, you see the file ribbon, which is also called the backstage view. The backstage view replaces the File menu used in earlier releases. It covers the entire area of the application and therefore offers you a much more refined experience than the traditional File menu. It offers the same basic commands that you saw in the traditional File menu, using which you can manage your projects i.e. create new projects, open existing projects, save, archive, print, set global options and much more.
In order to quickly offer you the functionality, the backstage view works with single mouse click i.e. clicking on a button or an item in a list will close the backstage view and execute the command. To return to your project from Backstage view, click the Home tab, or press ESC on your keyboard.
You can do the following things using the backstage view:
 Save
Save
Save the active project.
 Save As
Save the active project with a different name.
 Save All
Save all currently opened projects.
 Open
Open
Choose an existing project to open.
 Close
Close
Close the active project. You will be prompted to save the changes before the project is closed.
If there is an active project and you click on the File tab to open the backstage view, the Info tab is automatically selected. The Info tab displays some useful properties of the active project. It also displays commands i.e. Pack Project and Reset Project, depending on type of the active project.
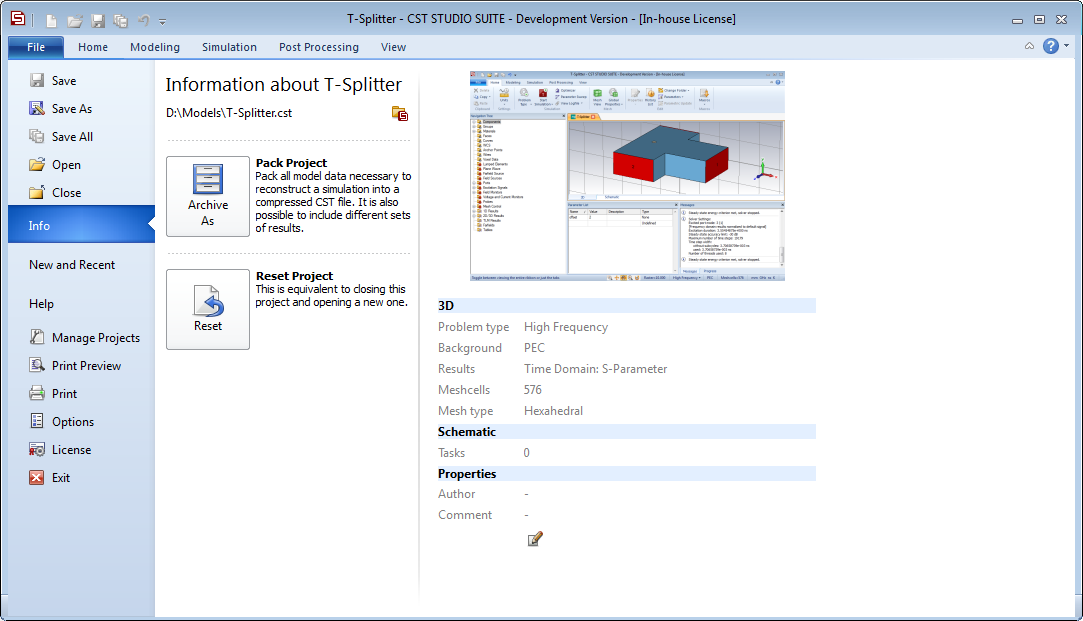
On the top left corner of the view, the name of the active project and
its complete path is shown. You can click on  to open the directory
of the project.
to open the directory
of the project.
The left side of the view shows the following commands that can be used on the active project.
 Pack Project
Pack all the model data of the active project to reconstruct a simulation into a compressed CST file. This is will open the archive as dialog.
 Reset Project
Reset the active project to start afresh. This is equivalent to closing this project and opening a new one, without closing the sheets. This command is only available for 3D based projects.
The right side of the view shows a snapshot of the current state of the active project and some useful information.
The information is categorized into 3D, Schematic and Properties.
3D: This category lists information from the 3D sheet. i.e. Problem Type, Background material, Results, Number of Meshcells and the Mesh type.
Schematic: This category lists information from the Schematic sheet. i.e. Number of Tasks
Properties:
This category lists general properties of the project. i.e. Author and
some comments. The general properties can be edited by clicking on  .
.
If there is no active project and you click on the File tab to open the backstage view, the New and Recent tab is automatically selected. The New and Recent tab displays the recently used projects, project templates, a command to create a new project template and a list of modules. As the name suggests, in this view you can open a recently used project or create a new one using the project templates or one of the modules.
On the far right side of the view, you'll see an information pane. This pane displays useful information when you hover your mouse over a recent project, a project template or a module.
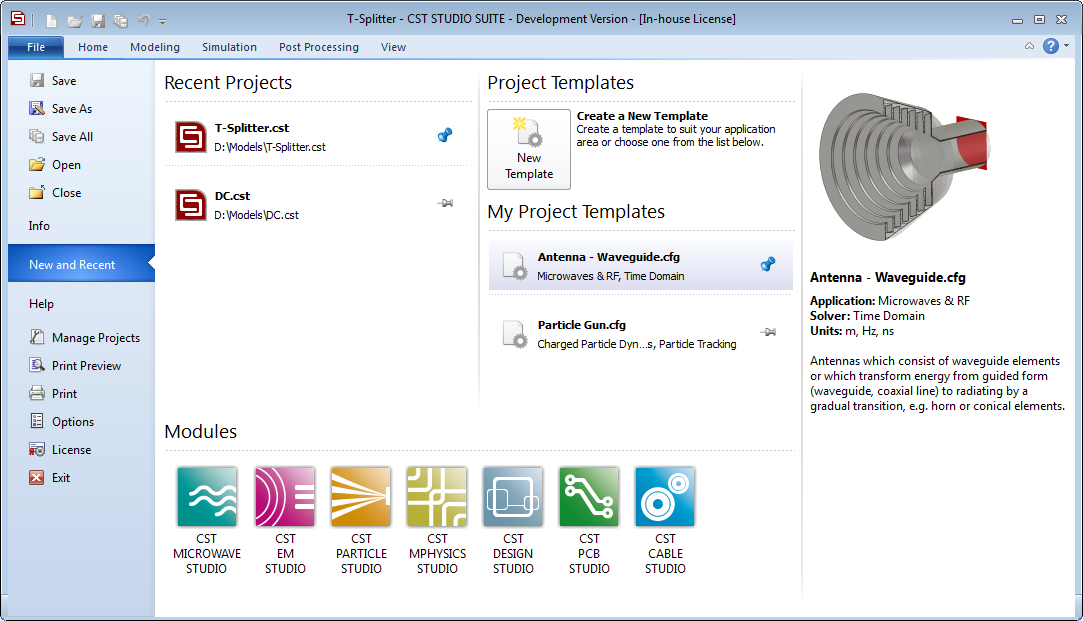
Recent Projects:
This list shows the recently used projects. You can organize your projects by pinning the favorite ones and they will be displayed at the top of the list. It is also possible to continue to work with the same set of projects you worked on in the last session. Click on 'Restore last session', the first item in the list to load the set of projects used in the last session, in the workspace window. To load a recent project, just click on one of the item in the list.
Project Templates:
In this section of the view, you can either create a new project template or use an existing one to create a new project using the predefined settings from one of your project templates.
Modules:
Displays a list of available modules. Select a module to create an empty project.
The Help tab is where you will find all the help and support. It also shows the application version information.
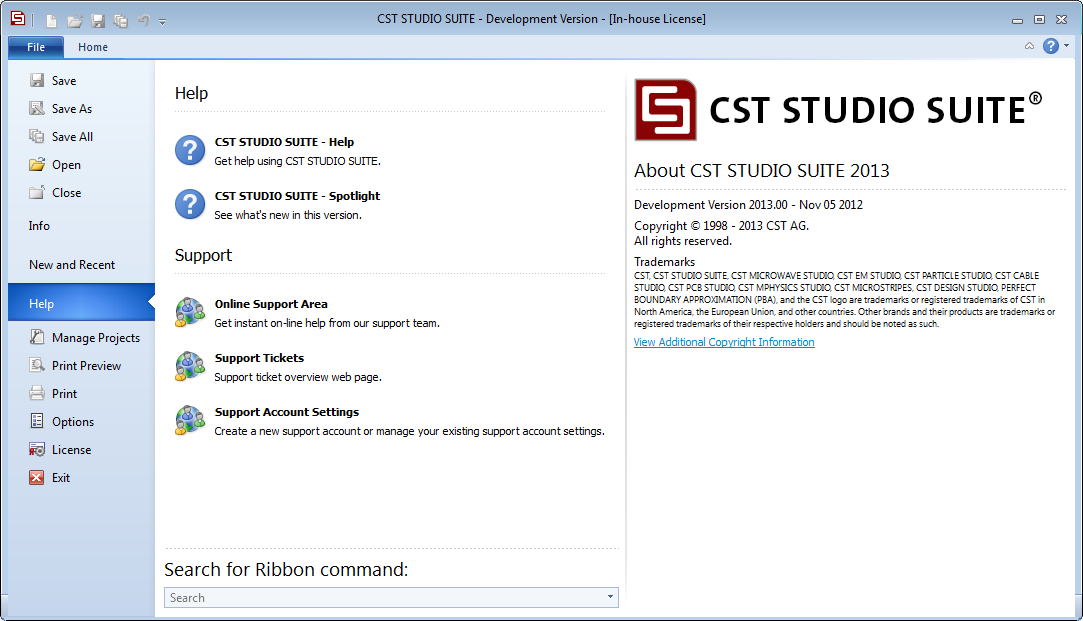
Help:
CST STUDIO SUITE - Help: This will take you to the help documentation.
CST STUDIO SUITE - Spotlight: This will show you the highlights of this version of CST STUDIO SUITE.
Support:
Online Support Area: This will take you to the support area. It gives you access to special announcements, upcoming training schedules, etc.
Support Tickets: This will take you to the support ticket page.
Support Account Settings: This will open the Support Account Settings dialog.
Search for Ribbon Command:
Here you can search for commands in the ribbon.
 Manage Projects
Open the manage project dialog to organize existing projects.
 Print Preview
Open the print preview dialog with the preview of the active sheet.
 Print
Print
Open the print dialog.
 Options
Open the options dialog to configure general settings.
 License
Open the license management dialog to manage license.
 Exit
Exit
Exit the application. You will be prompted to save the changes for all open projects before closing the application.