

Typical Examples
Framework to Control Result Templates
Pre-Loaded Post Processing Templates
Example for Post Processing Templates
Use of Existing 1D Results for Further Calculation
Defining a Name for a Template-Based Result
Use Template-Based Result for Parameter Sweep and Optimization
Typical examples for Post Processing Result Templates are 1D results such as the following:
1D Plots of 2D/3D field results along arbitrary curves
Mixture of any 1D-results using an analytic formula
or 0D-Results (single real scalar values)
Min, max, mean, integral, &ldots; values of existing 1D-results
Curve-, face- or volume integrals of 2D/3D results
Mixture of any of these 0D-results using an analytic formula
and more&ldots;
The following sections introduce the framework of this feature and present its application with an example.
The following picture shows the template-based post-processing
dialog box which you can open by choosing Post
Processing: Result Templates Template
Based Post processing (SHIFT+P):
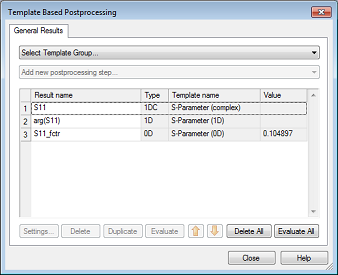
The dialog box contains the list of the currently defined sequence of post-processing operations. You can add new tasks to the list by first selecting the group of templates from the upper drop down list. Then you can select one of the templates belonging to this group from the lower drop down list.
You can easily rename a task by clicking on the corresponding line and directly changing its name in the list.
The Settings button allows you to change the parameters for the currently selected item.
Clicking the Duplicate button creates a copy of the currently selected item. Some post-processing operations require a lot of common settings. Instead of repeatedly entering all those settings, you may simply duplicate an existing entry and modify a few settings afterward.
The Evaluate button executes the currently selected task whereas the Evaluate All button executes the entire list from the beginning.
All Post Processing Templates are automatically processed after each solver run including parametric sweeps and optimizations. The execution takes place in the order shown in the list. You may need to change the order (up / down arrow buttons), especially if tasks refer to previously obtained data.
The template based post-processing results are managed as follows:
1D Results and complex
1D Results are shown in the navigation tree under Tables 1D
Results
 &ldots;
0D Results are shown
in the navigation tree under Tables 0D Results
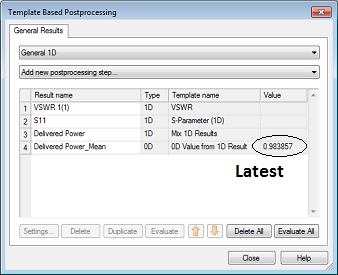
 &ldots; . Additionally the latest
result value is shown in the definition window.
Templates with a ”-” sign in front of their name do not add useful results to the navigation tree Tables folder, but store their results at other locations. Refer to the corresponding template description for more information.
After defining a Post Processing Template, the list of defined post processing operations shows the type of data which will be created by this template. A template of type "0D" will create a floating point number. A template of type "1D" will create a real-valued result curve and a template of type "1DC" will create a complex result curve. You can plot any result created by a Post Processing Template by selecting its item in the navigation tree. For a complex curve, the desired visualization mode (such as real part or imaginary part) may be chosen from the 1D Plot: Ribbon tab. Please refer to the Post Processing Template Layout page for more details about template data types.
The standard installation includes an extensive list of pre-loaded Post Processing Templates. They can be mainly categorized as follows:
Load data into the post-processing chain.
Calculate secondary quantities.
Extract data from other post-processing results.
variety of pre-loaded Post Processing Templates deals with the extraction of 1D or 0D data from fields.
We recommend you browse through the list of available templates to get an overview of what is already available. Each of the Post Processing Template’s settings dialog boxes contains a Help button which will open an online help system providing more information.
Since all Post Processing Templares are written in VBA programming language, you can add your own specific post-processing operations. Please refer to the online documentation or contact technical support for more information.
The following example shows a typical Post Processing Template for CST MICROWAVE STUDIO. However, even if you are using another module, we still recommend reading through this example since it gives general procedures common to all modules.
Let's assume you have simulated a device and want to directly obtain the VSWR and calculate the delivered Power (1-S11^2). You can take any example here that calculates S-parameters.
You should first select the template group "S-Parameters" from the upper drop down list. Then you should select the "VSWR" - template from the lower drop down list.
In a second step, leave the template group unchanged and select the template "S-Parameter". The S-parameter S11 is available from the navigation tree. However, since we would like to do further calculations with it, we have to explicitly load S11 as a task to be referred to later in another Post Processing Template.
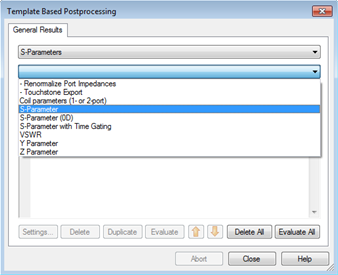
After configuring the template in the S Parameter window (we are interested in the linear amplitude of S11), you will see the following two templates of type "1D" in your list:
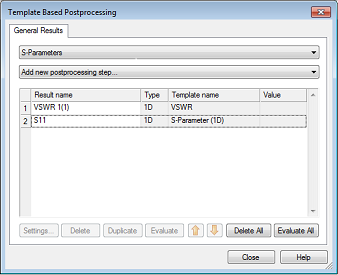
If the project has already been calculated and results are present, you may click Evaluate All, resulting in two tables in the tree, which you can select and plot. Otherwise start the calculation with the transient solver, which at the end automatically evaluates all templates in the given order.
Now we can calculate the delivered power (1-S11^2) using the Post Processing Template named Mix 1D Results. It can be found in the template group General 1D:
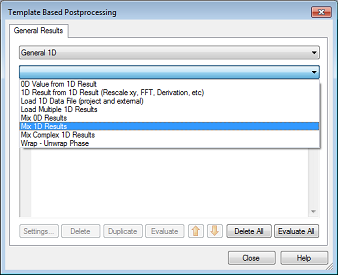
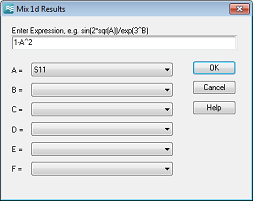
Selecting this task from the list opens the following window, where all previously defined 1D Results can be combined using VBA expressions. If we select A as a placeholder for S11, our expression would be 1-A^2.
Back in the template-based post-processing dialog box, you can set the name of the newly created task by clicking on the corresponding item and changing its name to Delivered Power. Clicking the button Evaluate will immediately add the corresponding result to the navigation tree Tables folder:
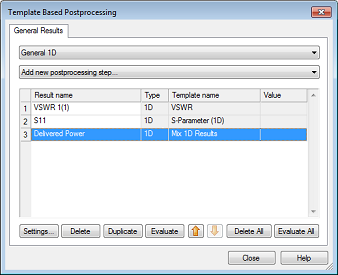
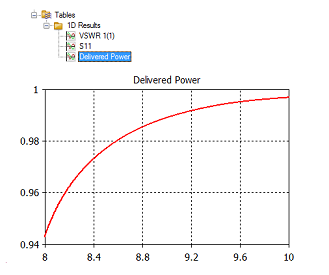
You can change the definition of any task by selecting the corresponding line and clicking Settings. Once defined, these extra results such as VSWR and Delivered Power will always be computed automatically once a simulation run is complete.
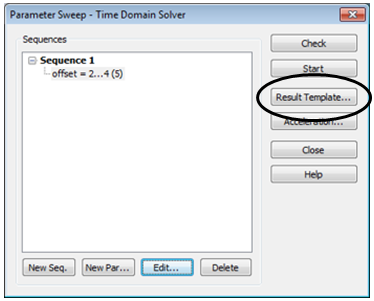
The Parameter Sweep dialog box offers direct access to all Post Processing Templates. Once the parameter sweep is complete, the VSWR or Delivered Power results can be visualized as a function of the structure parameters:

Let's now assume that you want to optimize the Delivered Power averaged over the entire simulation frequency band. This can be achieved by adding a Post Processing Template calculating the mean value of the Delivered Power. Therefore you can select the template group General 1D and select the template 0D Value from 1D Result:
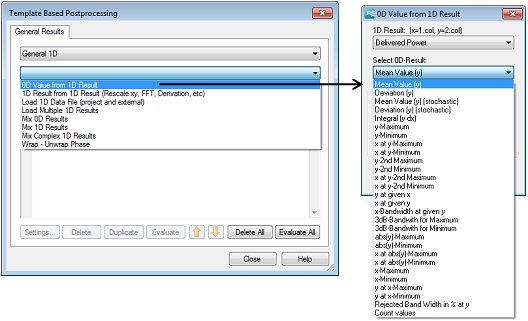
The results of 0D Post Processing Templates are also written to the Tables folder in the navigation tree after pressing the Evaluate button. In addition, the latest results are shown in the template-based post-processing dialog box directly:

A 0D Results task can also be used as the optimization goal of type 0D Result:

Template Based Post Processing Dialog, List of Preloaded Result Templates, File / Import Result Templates, Post Processing Template Layout